Strategic Locations for Mini-Split Installation to Achieve Superior Home Comfort
As an HVAC professional with extensive experience, I often encounter homeowners who appreciate the benefits of mini-split systems yet struggle with placement decisions. You might face similar issues, such as an upstairs room that becomes uncomfortably warm during summer afternoons or a family space with persistent temperature inconsistencies. These systems offer remarkable versatility and efficiency, and thoughtful installation choices can eliminate such problems while enhancing overall home comfort.
Mini-splits deliver targeted heating and cooling without relying on extensive ductwork, which makes their positioning crucial for performance. When units are placed optimally, they provide even temperature distribution and help reduce energy consumption. In my work, I have observed how precise placement turns potential frustrations into reliable comfort solutions that homeowners value for years.
The Importance of Thoughtful Placement
Mini-splits function by directing conditioned air straight into specific zones, in contrast to traditional central systems that distribute air through ducts. This direct approach means that the positions of both indoor and outdoor components directly influence airflow effectiveness, system efficiency, and user satisfaction. Incorrect setups can diminish performance by up to 30 percent, leading to uneven temperatures and higher utility bills; however, strategic choices minimize these issues and promote consistent comfort throughout the home.
From my fieldwork, I know that families achieve the best results when placement aligns with daily living patterns. Such decisions not only address immediate comfort needs but also contribute to long-term energy savings. Homeowners who prioritize this aspect often report noticeable improvements in their indoor environment.
Ideal Indoor Spots for Maximum Effectiveness
Certain areas of the home benefit particularly from mini-split installations, as they address common comfort challenges with precision.
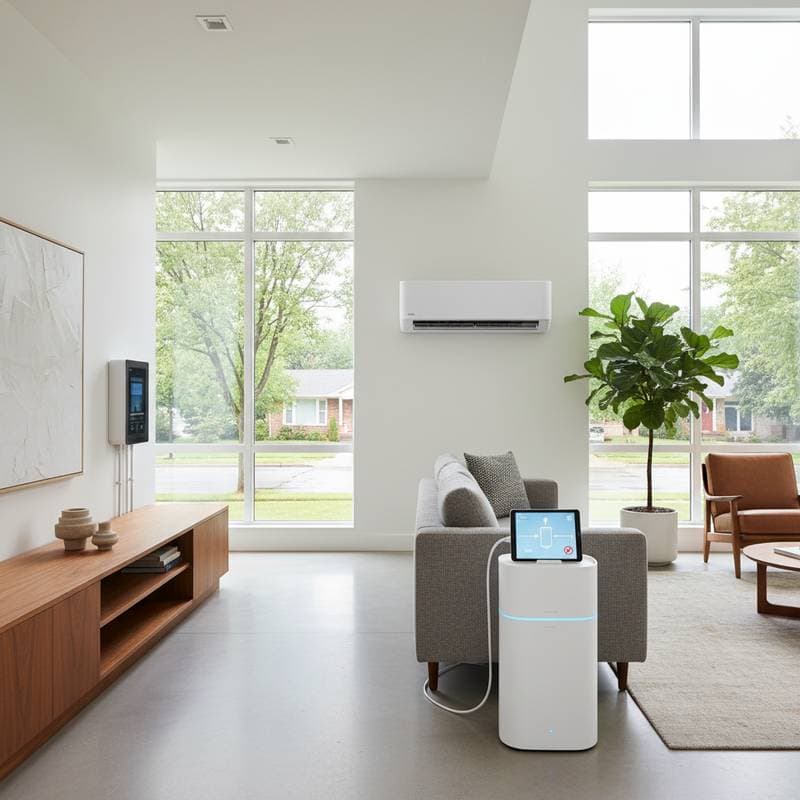
Living Rooms and Gathering Spaces
These high-traffic areas require uniform airflow to maintain a welcoming atmosphere. Mount the indoor unit high on a wall to facilitate wide air distribution, and position it away from main seating to avoid direct drafts while ensuring even coverage. This setup supports family activities without compromising comfort.
Bedrooms and Upper-Level Rooms
Upper floors tend to trap heat, which complicates cooling efforts. A mini-split in a bedroom provides quiet, effective temperature control for restful nights, outperforming noisier alternatives like window units. Install the unit to allow air circulation across the entire space, avoiding positions directly above sleeping areas that might create discomfort.
Kitchens and Open-Concept Layouts
Kitchens generate excess heat and moisture that standard systems may not handle well. A strategically placed wall unit counters these fluctuations efficiently, and in open floor plans, a central location enables one system to condition multiple connected zones. This approach maintains balance during meal preparation and daily routines.
Home Offices and Dedicated Work Areas
Remote work demands focused comfort without overcooling the entire house. Mini-splits enable zoned control, allowing you to maintain an ideal environment in your workspace during business hours. Such precision supports productivity and prevents unnecessary energy use elsewhere in the home.
Basements, Sunrooms, and Additions
These spaces often lack integrated ductwork, making them ideal candidates for independent systems. Mini-splits deliver robust heating and cooling in finished basements or extensions without requiring major structural changes. They adapt well to varied layouts, ensuring these areas remain comfortable year-round.
Essential Guidelines for Indoor Installation
Successful placement balances functionality with the home's design. Select elevated wall positions to promote superior air distribution, and ensure no furniture or decor obstructs the flow. Steer clear of spots with direct sunlight exposure, as this forces the unit to work harder and reduces overall efficiency; additionally, prioritize locations that allow easy access for maintenance tasks like filter cleaning.
These principles, drawn from practical experience, help avoid common pitfalls. Homeowners who apply them often enjoy seamless operation and minimal disruptions.
Optimal Positioning for Outdoor Units
The outdoor condenser plays a vital role in system performance, so install it on a stable, level base such as a concrete pad. Keep the area free from vegetation, barriers, or debris to support unrestricted airflow, and choose shaded locations to prevent overheating during peak sun hours. Maintain at least two feet of clearance around the unit to facilitate proper ventilation and ease of service.
In my installations, I advise against placing condensers near sleeping quarters if noise sensitivity is an issue, as even advanced models produce a subtle operational sound. Thoughtful outdoor placement enhances durability and efficiency.
Budget and Practical Factors to Consider
Factor in costs, which typically range from $3,000 to $5,000 per zone including equipment and professional services, while weighing the benefits of 20 to 30 percent reductions in cooling expenses compared to outdated systems. Safety remains paramount, as refrigerant lines demand handling by certified experts, and local regulations may necessitate permits to avoid future complications. These elements ensure a worthwhile investment that aligns with your home's needs.
Homeowners who plan ahead experience smoother processes and greater returns. Compliance with codes also preserves property value over time.
Preparing for Installation: A Practical Guide
Begin with a professional assessment to determine the appropriate system size based on your home's layout. Identify zones with the most significant comfort challenges, and collaborate with an expert to outline airflow patterns and ideal mounting heights. Clear outdoor spaces of any obstacles, and verify permit requirements to proceed confidently.
This structured approach tailors the system to your specific environment, yielding measurable improvements in comfort and efficiency. Families following these steps often achieve optimal results without unnecessary setbacks.
Moving Forward with Confidence
Every home merits reliable comfort regardless of external conditions, and well-placed mini-splits make this possible by boosting efficiency and minimizing expenses. These systems create inviting spaces protected from seasonal variations, enhancing daily life. Consult a qualified HVAC specialist to explore tailored options, and take the first step toward transforming your living environment.
Frequently Asked Questions
Q: How many rooms can one mini-split serve?
A: A single-zone unit conditions one primary area, while multi-zone configurations can support up to eight indoor units. The best option depends on your home's size and specific requirements.
Q: Can I install a mini-split myself to save costs?
A: No. Refrigerant handling requires EPA certification, and DIY attempts can void warranties. Engage a licensed professional for proper results.
Q: What is the best height for mounting the indoor unit?
A: Mount the unit approximately 7 to 8 feet above the floor to enable even air distribution throughout the room.
Q: How loud are mini-split outdoor units?
A: Modern units operate at about 50 to 55 decibels, comparable to a subdued conversation. Positioning them away from windows minimizes any noticeable sound.
Q: Will a mini-split add value to my home?
A: Yes. These energy-efficient systems enhance appeal for potential buyers by improving comfort and marketability.